Guides
Roles & Permissions
Roles are a way for Platform Admins to manage access and permissions across team members within a platform. While we do provide a handful of commonly requested Roles by default, such as Viewer and Money Mover, we also allow for the creation of custom Roles. Custom Roles allow for granular access controls down to specific bank accounts, transfer types, and other features.
Roles and permissions can get complicated, so before we get too far, let's start by defining a few related terms first:
Roles
Roles are a set of permissions assigned to one or more Users in the Column dashboard. By default, we provide five Roles: Admin, Developer, Money Mover, Viewer, and Check Depositor. Later in this guide we'll talk about creating custom Roles.
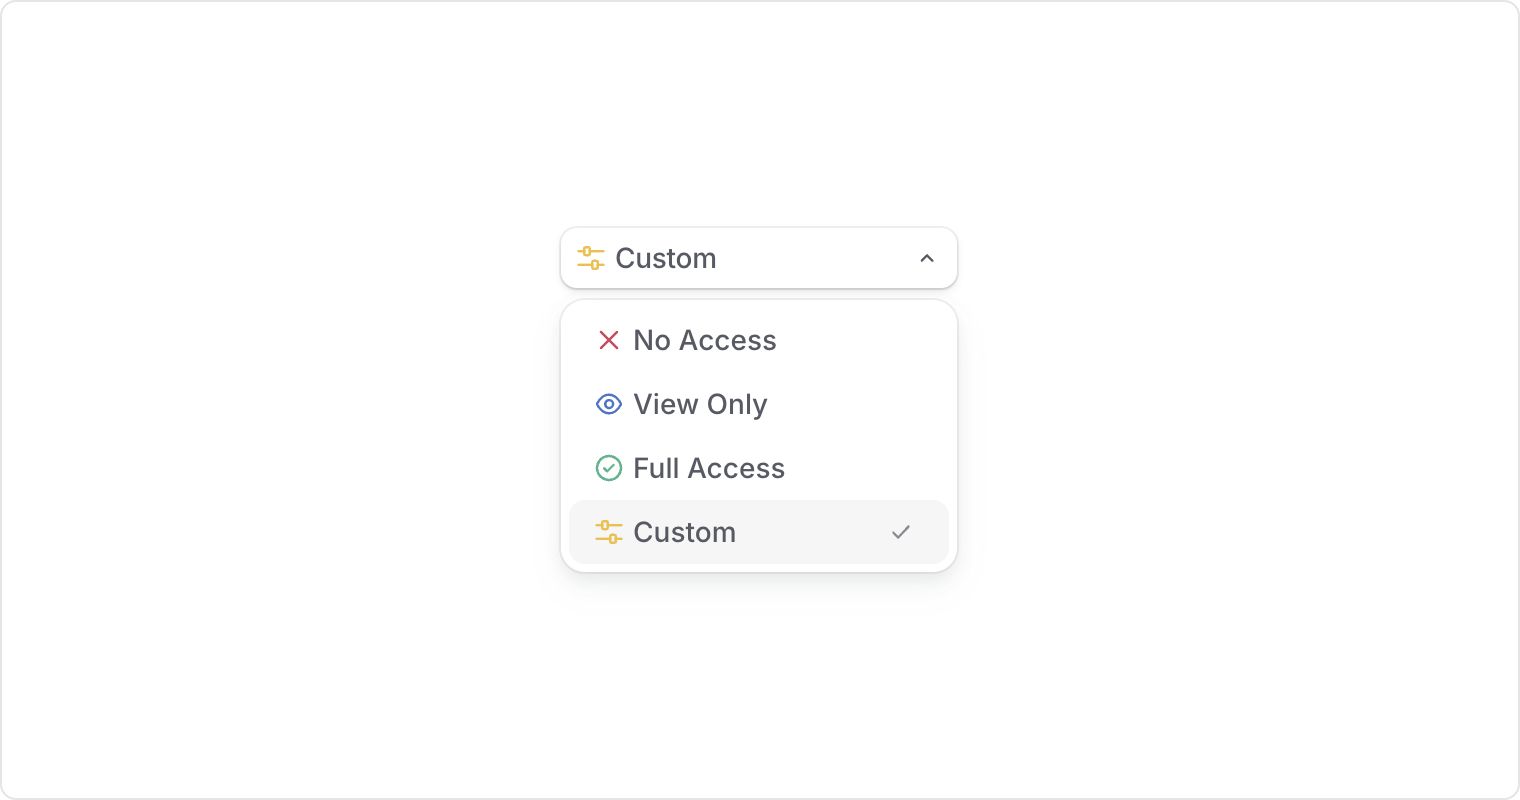
Roles are comprised of a series of permissions applied to various features and functions of the Column dashboard. All permission levels fall into one of four categories:
- Manage access — View, create, edit, and delete access
- View access — View access only
- No access — No access
- Custom — In this example, access to RDC and Check Scanner
Using Transfers as an example, with manage access users can create new transfers, issue stop payments, etc. but with view access users can only view transfer data and cannot move money or stop payments.
Assigning a Role
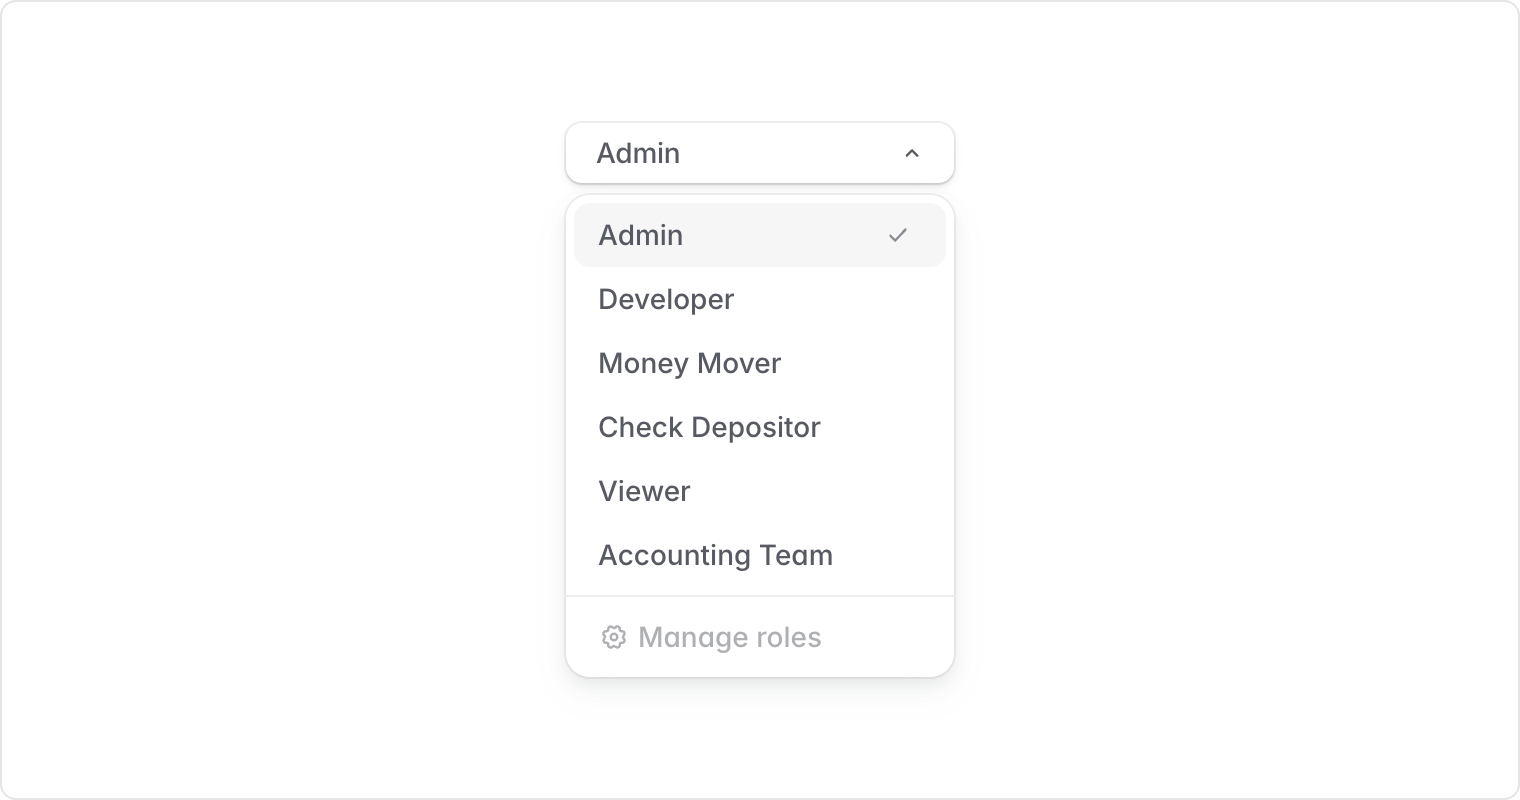
To assign a Role to a User, first navigate to the Team page under Platform in the sidebar. From here, Admins can set Roles to existing Users by editing the Role dropdown associated with each User. For new Users, simply click "Invite User," and from the modal, you'll be asked to assign a Role to each new User before sending them an invite email.
Creating a custom Role
In addition to default Roles, you can create your own custom Roles with granular control over specific bank accounts, transfer types, and other features.
Getting started
To start creating a new Role, first navigate to the Roles page under Platform in the sidebar. From this page, Admins will be able to view all the Roles that exist within your Platform, along with a short description of each. You may find that default Roles fit all of your needs, though if not, you can click "Create Role" to begin creating a new custom Role.
Upon clicking "Create Role" you'll see three tabs, starting with Role Info.
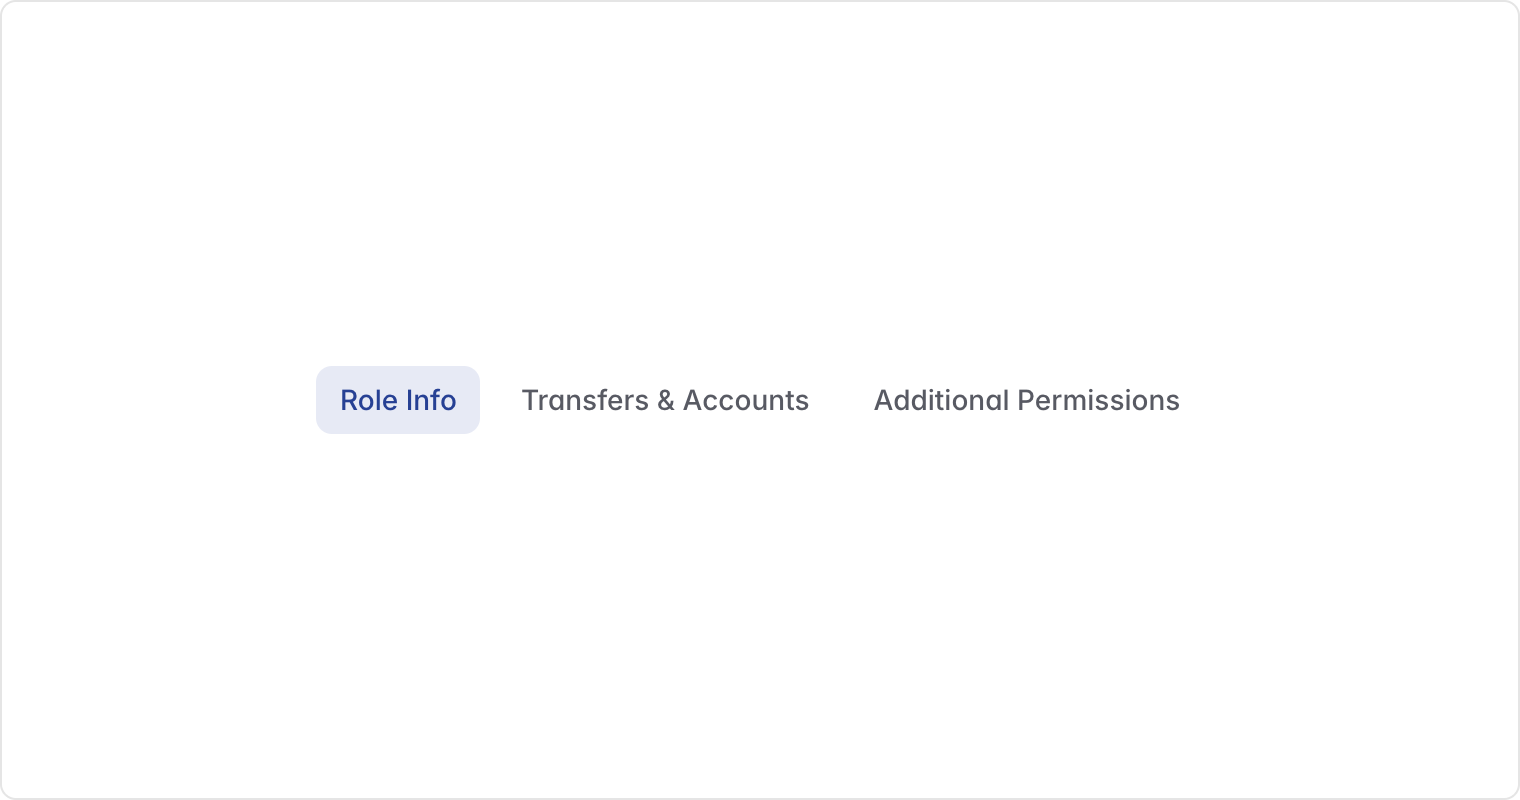
Role Info
From the Create Role page, you'll first be tasked with creating a name for the Role as well as a description of how the Role will be used. These fields are for your own internal reference and have no impact on any permission settings. Some examples for naming could be team based (ex: "Accounting Team"), location based (ex: "Austin Office"), or something else entirely (ex: "Something Else Entirely").
Transfers & Accounts
On the Transfers & Accounts page you'll find two categories of access controls, Default Account Permissions and Account Overrides, each allow you to stay broad or get granular.
Default Account Permissions
Put simply, Account Permissions are the available functionality for a given account, and the Default Account Permissions cover all currently existing and newly created Accounts unless overridden (more on that later).
Account permission options are bucketed into four categories No Access, View Only, Full Access, or Custom.
Custom
You can think of Custom permissions as between View Only and Full Access, customized to your needs. Access options fall under three categories, first being a list of individual Transfer types which you can toggle on and off. The following two categories cover default edit permissions for all existing Entities and Bank Accounts as well as those created in the future.
Full list of custom permission controls
Tip: If your intention for a custom Role is that you want to only grant access to a handful of accounts, we recommend first setting Default Account Permissions to No Access, then creating Account Overrides for the Accounts you'd like to grant permissions to.
Account Overrides
To create Account Overrides, navigate down the page where you'll see a list of Accounts, grouped by Entity. The same granularity of access can also be set on an account-by-account basis. You'll find that each Entity and Account is set to Default, though you can override any of the same individual permissions as is found under Default Account Permissions.
Helpful tips for creating account overrides
- If your Platform has a lot of Accounts, we encourage you to use the search box to quickly pull up the desired Account.
- The hierarchy of overrides begins with Default Account Permissions, which can be overridden on an Entity, and again overridden on an individual Bank Account.
- Regardless of if you are currently in Live or Sandbox modes, the list of Accounts displayed on the page is from Live mode, though this can be changed via the Sandbox/Live toggle.
- We allow for setting Custom overrides even when Default Account Permissions are also Custom. For example, if by default only Wire transfers are enabled, you could create an override on an individual Account which instead disables Wires and enables ACH Credits. In this scenario the overrides to Wires and ACH Credits turn blue, and will not change regardless of any future changes to the Default Account Permissions, but changes to other transfer types would be inherited unless overridden on the specific Account.
- Edit access, such as renaming an Account, can be inherited by Default Account Permissions or overridden on specific Entities or Accounts.
- Account creation access can be set on the individual Entity level, allowing a Role to only create Accounts associated with a given Entity.
Additional Permissions
The final tab of the Role creation process displays additional important permission controls. After reviewing permissions and making any desired changes you can save your role by clicking "Save Role."
Role management
Role editing
To make changes to an existing Role, first navigate to the Roles page, and click the Edit button associated with the Role you'd like to make changes to. You'll then be able to make changes to the Role much like creating the Role initially. Note: changes will not apply until clicking "Save Role."
Role deletion
To delete an existing Role, first ensure that no Users have been assigned to the Role, then navigate to the Roles page, and click the Edit button associated with the Role you'd like to delete. You'll then see a Delete Role button which you can use to delete the Role.